Mitch

About Mitch Baylis

This author has not yet filled in any details.
So far Mitch Baylis has created 72 blog entries.

Optimizing Webhook Scenarios in Make.com for Efficient Business Automation

2024-07-02T06:48:53+00:00July 2, 2024|Uncategorized|

Hey automation enthusiasts! 👋 Are you tired of your webhooks erroring out in Make.com? You’re not alone. Recently, I encountered a persistent issue and finally found a solution to solve it. Let’s dive into how you can optimize your webhook scenarios in Make.com to avoid hitting the dreaded 45-minute scenario limit.

Understanding the 45-Minute Scenario Limit ⏲️

Make.com imposes a 45-minute maximum scenario execution time. This means that if your scenario runs longer than 45 minutes, it will throw an error. In my case, the error occurred because the scenario was running multiple cycles within one webhook scenario run.

The Problem 🤔

Normally, a webhook runs one operation per webhook. However, it seems that Make.com has optimized for efficiency by grouping webhooks together, running multiple cycles within one scenario run. This resulted in my webhook data, which normally processes in about 20 minutes, being bundled into one operation. Consequently, my scenario hit the 45-minute mark and errored out.

The Solution 💡

To solve this issue, you need to ensure that your scenario processes webhooks separately. Here’s a step-by-step guide:

  1. Open your scenario in Make.com.
  2. Navigate to the Advanced Settings of the module.
  3. Look for the option to process webhooks separately. This option is often hidden under the Show Advanced Settings menu.
  4. Enable this setting to ensure that each webhook is processed as an individual scenario run.

By doing this, each scenario run will be approximately 20 minutes long (depending on your data set), thereby avoiding the 45-minute limit. 🥳

Advanced Scheduling Tips 🗓️

Initially, I tried to solve the problem by scheduling the scenario to run at regular intervals, with advanced scheduling to run on specific days and times. However, this didn’t solve the grouping issue. Ensuring that webhooks are processed separately is the key to resolving this.

Why Make.com Hides Useful Settings 🤷‍♂️

One of the quirks of Make.com is that it hides some of the most useful settings under the Advanced Settings menu. If you’re ever scratching your head trying to figure something out, it’s almost always hidden there. While this can be frustrating, it’s crucial to remember to check these settings when troubleshooting.

Final Thoughts 💭

This solution has saved me from weeks of frustration, and I hope it helps you too! Business automation is a powerful tool, but it comes with its own set of challenges. By understanding how to optimize your webhook scenarios in Make.com, you can ensure smoother and more efficient automation processes.

Happy automating! 🚀

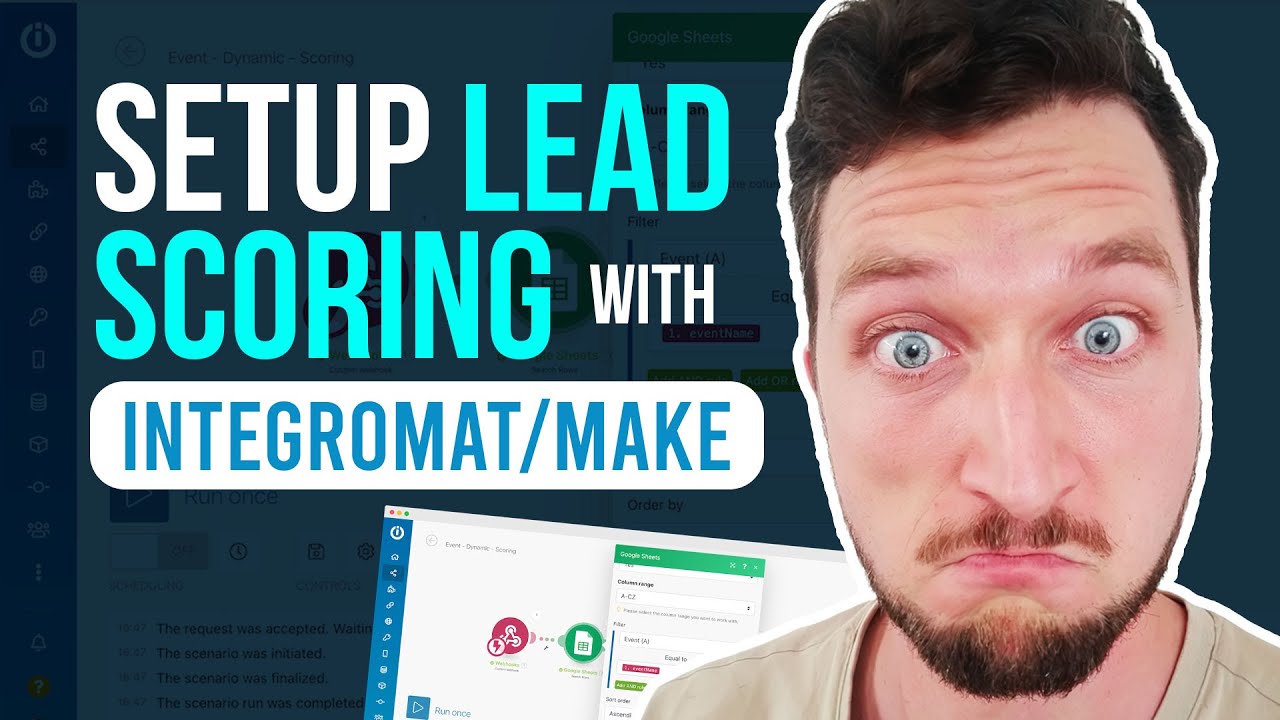
Mastering Custom Lead Scoring with Bubble.io and Make.com

2024-07-02T06:45:51+00:00July 2, 2024|Uncategorized|

Welcome to this deep dive into creating a custom lead scoring system using Bubble.io and Make.com (formerly known as Integromat). This guide will walk you through every step to help you understand and implement a robust lead scoring mechanism that can revolutionize your sales and marketing automation. 🚀

Getting Started: The Basics of Webhooks

The first step in building a custom lead scoring system is setting up a webhook in Make.com. A webhook is a way for an app to provide other applications with real-time information. For instance, you can collect data every time someone opens an email, clicks a link, or fills out a form. Here’s how to get started:

  • Set up your webhook to receive data.
  • Send example data to the webhook so Make.com knows what to expect.
  • Define a variable, such as an email address, and provide an example value.

Creating Your Lead Score Data Store

Next, you need a data store to keep track of your lead scores. Follow these steps:

  1. Add or update a record: Create a new data store and call it Lead Score Data Store.
  2. Define the data structure: Create a data structure named Lead Score with ID as the email address and another field for the score, which should be a number.
  3. Set data usage: Allocate a minimal storage size, such as one megabyte, as it won’t hold much data.
  4. Map the email as the unique key: This keeps your data structure clean and organized.

Implementing the Lead Scoring Logic

Once your data store is set up, the next step is to implement the logic to score leads:

  • Trigger the webhook: When data is received, create a record in the data store with an initial score of 1.
  • Handle duplicate records: If the webhook is triggered again, instead of overwriting the record, add to the existing score. This requires some additional logic:
if (record exists) {
 update record (add 1 to existing score);
} else {
 create new record (score = 1);
}

This ensures that the lead score increments with each interaction.

Adding Complexity to Your Scoring System

Your lead scoring system can be as simple or as complex as needed. Here are some advanced strategies:

  • Weighted Actions: Assign different points to various actions. For example, opening an email might be worth 1 point, while making a purchase could be worth 100 points.
  • Multiple Scores: Create different scores for different types of interactions, such as email opens, purchases, and website visits.

For instance, a purchase of a high-ticket item could be worth 100 points, while a smaller purchase might be worth 50 points. Similarly, frequent website visits could accumulate points over time.

Sending Data Back to Your App

The final step is to send the calculated lead score back to your app. This can be done by adding another module to your Make.com scenario:

  • Add a module: Take the calculated score and send it back to your app.

And there you have it—a fully functional, custom lead scoring system built with Bubble.io and Make.com. 🎉

Feel free to explore and tweak the system to match your specific needs! If you have any questions or need further assistance, don’t hesitate to reach out. Happy automating! 🤖

Automate Your PDF Creation with Bubble.io and Make.com

2024-07-02T06:42:02+00:00July 2, 2024|Uncategorized|

Hey there, automation enthusiasts! 🌟 Are you ready to dive into the world of automated PDF creation? Today, we’re going to explore how to create and pre-fill PDFs effortlessly using Bubble.io and Make.com. Whether you’re sending out gift certificates, thank-you messages, or any other one-way PDF, this guide will have you covered. Let’s get started! 🚀

Why Automate PDF Creation?

Automating PDF creation can save you countless hours and ensure accuracy in your documents. Imagine no longer needing to manually input data for each certificate or letter. With automation tools like Bubble.io and Make.com, you can streamline this entire process.

Tools You Need

  • Bubble.io: A visual programming platform that lets you build web applications without code.
  • Make.com: An automation tool to connect various apps and services, formerly known as Integromat.
  • PDFMonkey: A PDF generator that allows you to create and pre-fill PDFs using HTML and CSS.

Step-by-Step Guide to Creating a PDF

Here’s a concise guide to get you started:

  1. Create a Template: Use HTML and CSS to design your PDF template. Don’t worry if you’re not a coding wizard; you can save your design as an image and use it as a background.
  2. Set Up Your HTML: Create a body in your HTML and set the style. Use classes and IDs to manage your elements.
  3. Add Dynamic Data: Use JSON to pre-fill data into your PDF. Ensure your data is in the correct format to avoid errors.
  4. Style Your Text: Use CSS to position your text elements and style them with fonts from Google Fonts.

HTML and CSS Tips

Here are some quick tips to make your life easier:

  • Use IDs for Styling: Assign unique IDs to each text element for precise positioning and styling.
  • Google Fonts: Import Google Fonts in your CSS to make your PDFs look professional and stylish.
  • Absolute Positioning: Use absolute positioning to place elements exactly where you want them on the page.

Automating the Process with Make.com

Once your template is ready, it’s time to automate the process. Here’s how:

  1. Connect Your Apps: Use Make.com to connect your CRM, database, or form submission tool to PDFMonkey.
  2. Set Triggers: Define triggers in Make.com, such as form submissions or a stage change in your sales pipeline, to initiate the PDF creation.
  3. Map Data: Map your CRM or form data to the fields in your PDF template.
  4. Generate and Send: Automatically generate the PDF and send it to the client or save it to a folder like Google Drive.

When to Use Other Tools

If you need signatures or additional client input, consider using tools like PandaDoc or Proposify. These platforms offer more advanced document management features, including tracking and authorization capabilities.

Conclusion

Automating PDF creation with Bubble.io and Make.com can transform your business processes, saving you time and reducing errors. PDFMonkey makes it simple to pre-fill PDFs with dynamic data, and with a bit of HTML and CSS, you can create professional-looking documents in no time. Give it a try and see the difference automation can make! 🌟

Got questions? Drop them in the comments below. We’d love to hear from you! 😊

Streamline Your CRM: How to Clean and Validate Addresses in Pipedrive with Bubble.io and Make.com

2024-07-02T06:41:10+00:00July 2, 2024|Uncategorized|

Hey there, automation aficionados! 🤖 Today, we’re diving into the nuts and bolts of cleaning up and validating addresses in Pipedrive. Address validation is crucial for maintaining clean data and avoiding those pesky duplicate records. So, let’s get your addresses sharp and squeaky clean! 🧼

Why Address Validation Matters

In Pipedrive, organizations are uniquely identified by bundling the organization name and address. If there’s a slight change in the address (e.g., 41 Pepstone vs. 42 Pepstone), it can create duplicates. This mismatch can lead to data inconsistency, making it difficult to manage your CRM efficiently.

Step-by-Step Guide to Clean Up Addresses

1. Set Up a Filter

First, we need to set up a filter in Pipedrive:

  • Criteria 1: Organization address is not empty.
  • Criteria 2: Organization address details are empty.

This filter helps identify records where the address is present but not detailed.

2. Export Filter Results

Next, export these filtered results as a CSV file and upload it to Google Drive. Open it with Google Sheets to proceed.

3. Clean Up Data in Google Sheets

Ensure that your sheet contains the Organization ID, Pipedrive ID, and the address field. If you have the name field, consider tidying it up to title case using add-ons.

4. Create a Scenario in Make.com

Here’s where the magic happens! 🌟 Let’s create a scenario in Make.com:

  • Step 1: Watch rows in the Google Sheet.
  • Step 2: Use the Google Maps Get Location module.
  • Step 3: Map the address column (e.g., Column B) to the module.
  • Step 4: If valid, update the row with the detailed address from Google. If invalid, delete the address.

5. Run the Scenario

Configure the scenario to run and watch it work its magic. Invalid addresses will be nulled out, and valid ones will be enriched with details like suburb, state, zip code, and country.

6. Download Updated Data

Once the scenario has run successfully, download the updated data as a CSV file.

7. Import into Pipedrive

Finally, import the cleaned-up data back into Pipedrive:

  • Match the import with the existing organization IDs to avoid creating duplicates.
  • Map the name and address fields to update them.

Voilà! Your Pipedrive data is now clean and ready for action! 🚀

Why Use Bubble.io and Make.com?

Bubble.io and Make.com are powerful tools that simplify business automation:

  • Bubble.io: A no-code platform that lets you build sophisticated apps without writing code.
  • Make.com: (formerly Integromat) A powerful automation tool that helps you connect apps and automate workflows.

Combining these tools can supercharge your business processes, saving you time and reducing errors.

Conclusion

Address validation might seem like a small detail, but it plays a huge role in keeping your CRM data accurate and efficient. With this guide, you can ensure that your Pipedrive records are always in top shape. If you need further assistance with business automation, feel free to reach out and schedule a call. Let’s make your business processes seamless together! 🌟

Happy automating! 🚀

How to Set Up an Instant Trigger for Airtable with Make.com: A Step-by-Step Guide

2024-07-02T06:35:21+00:00July 2, 2024|Uncategorized|

How to Set Up an Instant Trigger for Airtable with Make.com: A Step-by-Step Guide 🚀

Welcome to the ultimate guide on setting up an instant trigger for Airtable using Make.com! If you’re a business automation enthusiast leveraging Bubble.io and Make.com, you’re in the right place. Let’s simplify your workflow and save those precious operations.

Why Instant Triggers Matter 🌟

Instant triggers are crucial for efficient and timely automation. Unlike the Watch Records Trigger in Make.com, which polls data at intervals, instant triggers execute your scenarios immediately when a specific condition is met. This not only saves operations but also ensures your data is always up-to-date without frequent server polling.

Step-by-Step Guide to Setting Up Instant Triggers in Airtable ⚙️

Step 1: Create a Webhook in Make.com

First, you need to create a webhook in Make.com. Follow these simple steps:

  1. Log in to your Make.com account.
  2. Navigate to the ‘Scenarios’ section and create a new scenario.
  3. Select the ‘Webhooks’ module and choose ‘Custom Webhook’.
  4. Copy the webhook URL provided.

Step 2: Set Up an Airtable Automation

Now, let’s configure the automation in Airtable:

  1. Go to your Airtable base.
  2. Ensure you are on the Pro or Plus plan to enable automations.
  3. Create a new view that will serve as the trigger for the automation.
  4. Navigate to the ‘Automations’ tab and create a new automation.
  5. Select the trigger ‘When record enters view’ and choose your view.
  6. Add an action, select ‘Run a script’, and paste the webhook URL copied from Make.com.

Step 3: Test Your Automation

Before going live, it’s essential to test your setup:

  1. Manually add a record to the view you created in Airtable.
  2. Check Make.com to see if the scenario is triggered.
  3. Monitor the logs to ensure everything is running smoothly.

Advantages of Using Instant Triggers 🚀

Using instant triggers offers several benefits:

  • Operational Efficiency: Reduce the number of operations and API calls, saving costs and resources.
  • Real-Time Updates: Keep your data current with immediate updates.
  • Server Health: Avoid excessive polling that can lead to server blocks or slowdowns.

Common Pitfalls and How to Avoid Them 🚧

While setting up instant triggers, be mindful of the following:

  • Plan Limitations: Ensure your Airtable plan supports automations.
  • Webhook URL Accuracy: Double-check the webhook URL to avoid misconfigurations.
  • Testing: Always test your automation in a staging environment before deploying it live.

Conclusion 🎉

Setting up instant triggers in Airtable using Make.com can significantly enhance your business automation workflow. With this guide, you’re well-equipped to create efficient, real-time automations. Say goodbye to unnecessary operations and hello to a streamlined process!

Happy automating! 🚀

Mastering Error Handling and Advanced Automation with Bubble.io and Make.com

2024-07-02T06:24:07+00:00July 2, 2024|Uncategorized|

Welcome to another exciting deep dive into the world of business automation! 🌟 In today’s blog, we’re peeling back the layers on an advanced scenario using Bubble.io and Make.com (formerly known as Integromat). We’ll walk through error handling and various strategies to tackle unexpected issues that pop up when crafting automation scenarios. 🚀

But before we jump into the nitty-gritty, here’s a video that provides a comprehensive overview:

Getting Started with Advanced Automation

For those who are new to the automation game, understanding the basic flow is crucial. In this scenario, we are dealing with a webhook from ActiveCampaign triggered by a demo booked event from Calendly. This triggers an automation that sends the webhook, and here’s where the magic begins! ✨

Introducing the Router Step

The first critical element in this scenario is the router step. Routers in Make.com allow you to direct the flow of data in multiple directions based on specific conditions. The packages (or bundles) will always start at the top path and complete it entirely before moving on to the next. This sequential execution ensures that all paths are followed in order. 🛤️

🔍 Pro Tip: Use the ‘auto align’ feature to ensure your paths are in the correct order, and ‘explain flow’ to visualize the sequence.

Step-by-Step Walkthrough

Let’s break down the scenario:

  1. Finding the Deal ID in Pipedrive: The deal ID is stored in ActiveCampaign and can be referenced across various scenarios. If the ID exists, the flow continues down path one. If not, it moves to path two.
  2. Path One – ID Exists: The variable is set to be used in the campaign.
  3. Path Two – ID Does Not Exist: Look up the person in Pipedrive. If the person doesn’t exist, create the person and set the person ID. If the person ID is found, just set it.
  4. Common Path: After paths one and two, the flow converges to get the person ID set in the previous paths.

Handling Errors Like a Pro

One of the biggest challenges in automation is handling errors gracefully. Here are some tips to help you navigate through potential pitfalls:

  • Validation: Always validate incoming data to ensure it meets the required criteria before processing. ✅
  • Error Branching: Use conditional paths to handle errors separately. This way, your main flow remains unaffected. 🌿
  • Logging: Maintain logs for debugging and auditing purposes. This can be invaluable when diagnosing issues. 📝

Why Bubble.io and Make.com Are a Perfect Match

The synergy between Bubble.io and Make.com is undeniable. Bubble.io offers a no-code platform to build sophisticated web applications, while Make.com provides the automation engine to integrate and streamline workflows. Together, they empower businesses to operate efficiently and effectively. 🌐

✨ Here are some benefits:

  • Scalability: Easily scale your applications and workflows as your business grows. 📈
  • Flexibility: Customize your automation to fit unique business needs. 🛠️
  • Efficiency: Reduce manual intervention, allowing your team to focus on more strategic tasks. ⏱️

Conclusion

In this blog, we’ve navigated through the complexities of advanced automation using Bubble.io and Make.com. From setting up routers to handling errors, we’ve touched upon key strategies to optimize your workflows. 🎉

Remember, the goal is to create seamless and efficient processes that enhance productivity and drive business growth. Happy automating! 🤖

Mastering YouTube Video Automation with Bubble.io and Make.com

2024-07-02T06:17:17+00:00July 2, 2024|Uncategorized|

Are you looking to streamline your YouTube video creation process? 🚀 As a business automation expert specializing in Bubble.io and Make.com, I’m here to show you a step-by-step guide to automate your YouTube video workflow. By following this guide, you can quickly create, edit, and upload videos, saving you tons of time and effort. Let’s dive right in!

Building Your Airtable Database

First things first, you’ll need an Airtable database to manage your video creation process. In this database, you’ll conduct keyword research to generate ideas for your videos. With 2000-4000 keywords at your disposal, you’ll never run out of content to create. 📝

Recording Videos Efficiently

To record your screen and solve specific problems, I recommend using Loom. Although Loom offers a free version, I personally use the paid version due to its extensive features. Recording tutorials for clients and your team can be a game-changer in simplifying complex tasks. 🎥

Storing and Managing Recordings

Once you’ve recorded your video, store the URL in your Airtable database. Each entry should include the recording URL, a video title, and a description. This allows you to easily manage and edit your videos later. 📦

Editing with Premiere Pro

Use Premiere Pro to edit your videos. Import your source file and make necessary cuts and blurs. To expedite the process, save common effects as templates. This way, you can edit a 10-minute video in just a few minutes. 🖥️

Encoding with Adobe Media Encoder

Once editing is complete, use Adobe Media Encoder CC to encode your video files. This step is resource-intensive, so it’s best to run it when you’re away from your computer. ⏳

Creating Thumbnails with Canva

For thumbnails, I use Canva. This free graphic design tool lets you create stunning visuals quickly. Upload your thumbnail to Airtable and check the box once the privacy blurring is applied. 🖼️

Automating Links with Make.com

With Make.com, create a unique Bitly link for each video. This link will be added to your video’s description, allowing you to track engagement metrics and understand where your traffic is coming from. 🔗

Scheduling and Uploading to YouTube

Schedule your video releases directly in Airtable. With a year’s worth of content planned out, you can upload multiple videos at once, copying titles, descriptions, and thumbnails seamlessly. 📅

Automating Social Media Posts

Lastly, automate your social media updates. Use Make.com to post your YouTube links and descriptions to Facebook and LinkedIn. This ensures your content reaches a wider audience without any extra effort. 📣

Voila! With these steps, you can fully automate your YouTube video creation process, from ideation to social media posting. 🌟 Got any questions or comments? Drop them below and let’s keep the conversation going!

Streamline Your Invoice Management with Bubble.io and Make.com

2024-07-02T06:08:26+00:00July 2, 2024|Uncategorized|

Are you tired of sifting through endless emails and attachments to find your invoices and receipts? Imagine having all your invoices and receipts neatly organized and easily accessible at any time. With the power of Bubble.io and Make.com, you can automate this process and save hours of manual work! 🕒✨

In this blog, we’ll walk you through a scenario that stores all your invoices and receipts in Google Drive and a database, allowing you to find what you need quickly and effortlessly. Whether you use Gmail, Outlook, or any other email provider, this automation will work for you.

Getting Started: Setting Up Your Email Trigger 📧

The first step in this automation is to set up an email trigger. For this example, we’ll use Gmail, but you can use other email providers as well. Here’s how:

  • Create a label (folder) in Gmail called “Invoices.”
  • Set up a Gmail filter to automatically tag incoming emails with this label.
  • Watch this folder for new emails using Make.com.

This setup ensures that any email tagged as an invoice will trigger the automation scenario. 📨

Extracting Invoice Amounts with Regex 🧮

Next, we’ll use regex (regular expressions) to extract the dollar amounts from the email body. This involves finding the dollar symbol and capturing the subsequent digits. Here’s a quick rundown:

  • Escape the dollar symbol as it’s a special character in regex.
  • Use a named capture group to capture digit values followed by a period and more digits.
  • Aggregate matches to find the total amount.

This ensures we capture all relevant amounts, including tax, subtotal, and total. 🧾

Uploading Attachments to Google Drive 📂

Now, let’s handle email attachments. If an email has a PDF attachment (common for invoices and receipts), we’ll upload it to Google Drive. Here’s what we do:

  • Filter for PDF attachments to avoid uploading unnecessary files like signatures or logos.
  • Create a custom file name with the format: YYYYMMDD_SenderName.

This naming convention keeps your files organized and easy to find. 📅

Storing Data in Airtable 📊

We also want to store invoice data in a database like Airtable. This includes details like:

  • Date received
  • Google Drive file URL
  • Supplier name
  • Email subject and body
  • Total amount

This allows for quick access and further manipulation if needed. 🗄️

Handling Edge Cases 🚧

There are a few edge cases to consider:

  • If no attachment is found, create a blank record.
  • If the total amount is not in the email body, consider converting the PDF to a text file and extracting the amount.

Tools like CloudConvert can help you convert PDFs to text files or Word documents for further processing. 📑

Conclusion 🎉

This automation scenario is a game-changer for managing invoices and receipts. By leveraging Bubble.io and Make.com, you can save time, reduce errors, and keep your documents organized. Whether it’s tax time or end-of-quarter billing, you’ll have everything you need at your fingertips. Try it out and see the difference it makes! 🚀

Happy automating! 😊

Automate Your SMS Notifications with Bubble.io and Make.com

2024-07-02T05:46:17+00:00July 2, 2024|Uncategorized|

Are you looking to streamline your SMS notifications using automation tools like Bubble.io and Make.com? 🛠️ Let’s dive into how you can make this happen seamlessly.

In this post, we’ll walk you through using Make.com and SMS services like TextMagic and ClickSend to automate your SMS notifications. 📱

Why Automate Your SMS Notifications?

In today’s fast-paced world, staying connected is crucial. Automating SMS notifications can help you:

  • Save Time: No more manual texting! Set it and forget it.
  • Increase Reliability: Ensure timely delivery of important messages.
  • Personalize Communication: Send customized messages without the hassle.

Getting Started with ClickSend

First, let’s look at sending an SMS with ClickSend. Follow these steps:

  1. Connect ClickSend to Make.com: Navigate to the ClickSend SMS module and select ‘Send SMS’.
  2. Authenticate Your Account: You’ll need your ClickSend username and API key. Find these in the API credentials section on ClickSend’s website.
  3. Compose Your Message: Input the recipient’s phone number in E.164 format (e.g., +1234567890) and craft your message in the body field.

Formatting Phone Numbers

Formatting phone numbers correctly is crucial. Most users will input numbers in local formats, which might break your logic. Here’s a quick solution:

  1. Use the phone number module in Make.com to parse and convert numbers to E.164 format.
  2. Map the converted number to your SMS module to ensure proper formatting.

Scheduling SMS Notifications

Timing is everything. To send messages at specific times, consider these options:

  • Use a Database: Store messages in a database like Airtable or Make.com’s data storage. Schedule checks every 15 minutes to send messages at the right time.
  • ActiveCampaign Integration: Send data to ActiveCampaign and use its automation features to handle timing and delivery.

Database Method

Log messages in a database and set up a scenario to check for due messages at regular intervals. Mark messages as sent or delete them after sending.

ActiveCampaign Method

This method is simpler and more robust. Use ActiveCampaign to store and schedule your messages. Set up a wait condition to send notifications at the desired time.

Both methods have their pros and cons. Choose the one that best fits your needs. 👍

Conclusion

Automating your SMS notifications with Bubble.io and Make.com can save you time, ensure timely message delivery, and enhance your communication strategy. Whether you use ClickSend, TextMagic, or another service, these tools can help you stay connected effortlessly. 🚀

Ready to automate your SMS notifications? Get started today and enjoy seamless communication with your contacts! 🥳

Automate Invoice Processing: Integrating Docparser with Bubble.io and Make.com

2024-06-28T05:36:55+00:00June 28, 2024|Uncategorized|

Are you tired of manually sorting through your inbox, extracting invoice details, and uploading them to Google Drive? 😩 Fear not! Let’s dive into how you can use Docparser to automate these tedious tasks with Bubble.io and Make.com. 🚀

Step-by-Step Guide to Automate Invoice Processing

Automation is the key to efficiency, and this guide will walk you through setting up an automated system to handle your invoices.

1. Setting Up Docparser

First, head over to Docparser and sign up. It’s a fantastic resource that can extract data from PDFs and other documents without much customization.

Once signed up, add a new parser. Docparser provides pre-configured parsers for various document types, like invoices. These templates come with built-in rules to extract invoice numbers, dates, account numbers, totals, line items, and more. 🧾

If the pre-configured parsers don’t suit your needs, you can dive into more advanced settings using regex (regular expressions). This will help you fine-tune the data extraction process.

2. Integrating Docparser with Make.com

Next, we need to create a scenario in Make.com. Follow these steps:

  1. Create a new scenario and select the Webhooks module. This will be triggered from Docparser.
  2. Set up the webhook to listen for parsed documents from Docparser.
  3. Map the parsed document data to the appropriate fields in your target system, such as Google Sheets, Airtable, or any other app you use.

3. Mapping Data to Your Spreadsheet

Now, let’s get the parsed document and update our spreadsheet:

  1. Add a module to retrieve the parsed document’s details.
  2. Map the data fields (like invoice number, date, totals, etc.) from the parsed document to your spreadsheet columns.
  3. Store the document ID in your spreadsheet to easily update records without searching for the file.

4. Handling Multiple Attachments

If you receive multiple attachments in an email, Docparser can handle that too! Just ensure your Make.com scenario is set up to process each attachment individually.

5. Error Handling

To make your automation more robust, add error handling in your Make.com scenario. This ensures that any issues during the data extraction or update process are caught and managed properly. 🛡️

Bonus Tips 💡

Docparser’s free plan offers 30 parsing credits per month, which is quite generous. You can process one document up to five pages with one parsing credit. To maximize this, consider using tools like CloudConvert to merge multiple PDFs into one, allowing you to process more documents with fewer credits.

Docparser supports various file formats, including PDFs, Word documents, and images. The extracted data can be downloaded in different formats like Excel or CSV, or directly connected to Google Sheets.

Conclusion

Using Docparser with Bubble.io and Make.com can significantly streamline your invoice processing workflow, saving you time and reducing errors. Give it a try, and let us know how it works for you in the comments below! 😊

Happy automating! 🚀

Go to Top